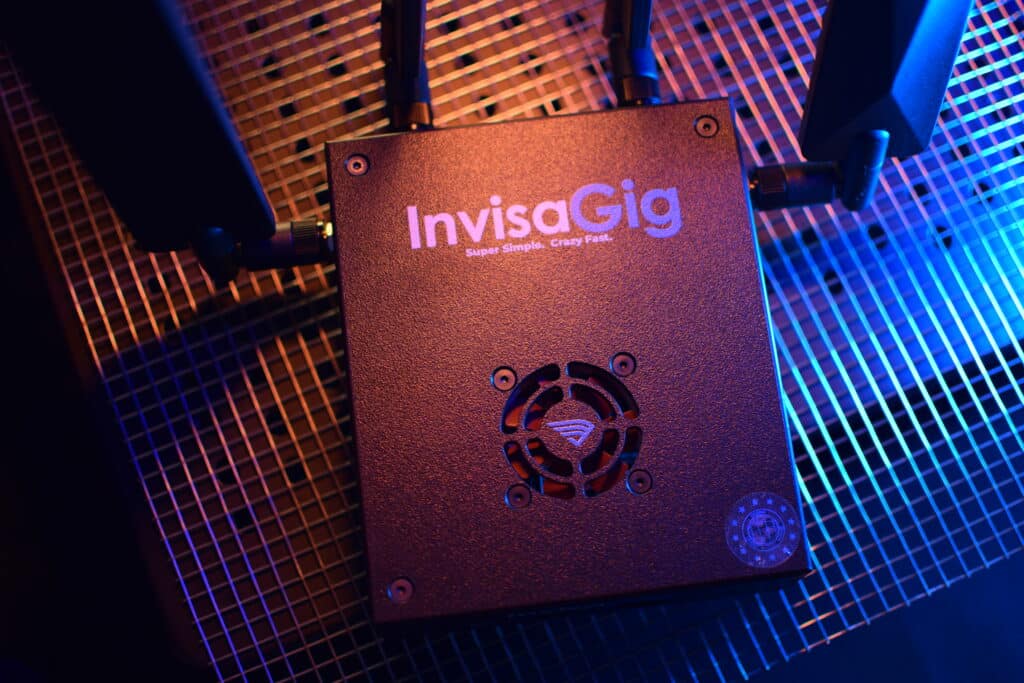
Manually Setting a Cell Tower Lock With Your InvisaGig 5G Cellular Modem
Locking Onto a Cell Tower With the InvisaGig 5G Cellular Modem
Manual Entry Tower Cell Lock on the InvisaGig 5G Modem

Hey everybody!
Richard from InvisaGig here with an article to help you maximize value from your InvisaGig 5G cellular modem, as well as your cellular data plan. I made a new video explaining the super simple way to manually set a cell tower lock when the cell scan seems to refuse to show a band you know you can and have connected to. You can either watch the video above, or just read the article below to take control of which towers you receive data from. Enjoy!
How Do We Make Our Modem Lock Onto a Specific Cell Tower, and Why Would We Want To?

Advanced Modem Settings Deciphered: Cell Tower Locking
In this guide, we’ll walk through the process of manually setting a cell tower lock on the InvisaGig. While this is a slightly more advanced topic, the process remains simple and fast—just like the InvisaGig itself!

Understanding Cell Tower Locking
Cell tower locking allows you to force your InvisaGig to connect to a specific tower rather than letting it automatically choose. This can be useful if:
You want to connect to a tower that provides better speeds but isn’t the default choice.
You notice frequent network switching causing instability.
Your device keeps connecting to a weaker tower despite stronger options being available.
We’ll cover both 5G Standalone (SA) and LTE/5G Non-Standalone (NSA) configurations and how to manually select the best option.
Cell Tower Locking With the InvisaGig in 5 Steps

Step 1: Accessing the Connection Configuration
Log into your InvisaGig device.
Navigate to Connection Configuration and select Local Tower Search.
Choose either LTE or 5G Standalone (SA) for scanning available towers.
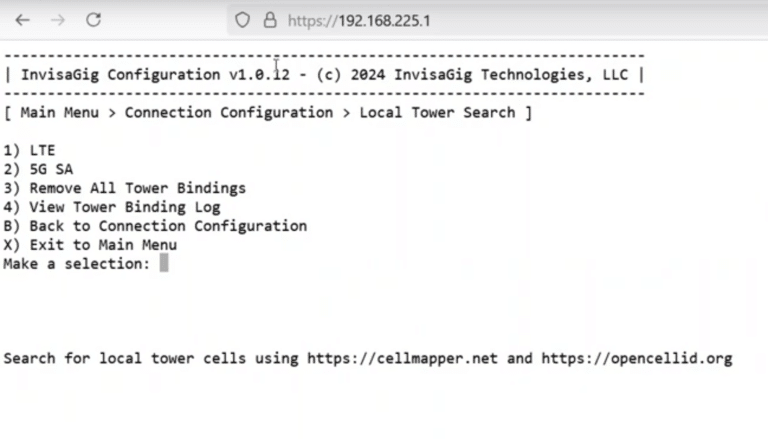
Note: AT&T and Verizon currently only support Non-Standalone 5G (NSA), meaning the primary connection is LTE, with 5G used as an additional aggregated connection. Only T-Mobile supports full Standalone 5G (SA) in select areas.
Step 2: Running a Tower Scan
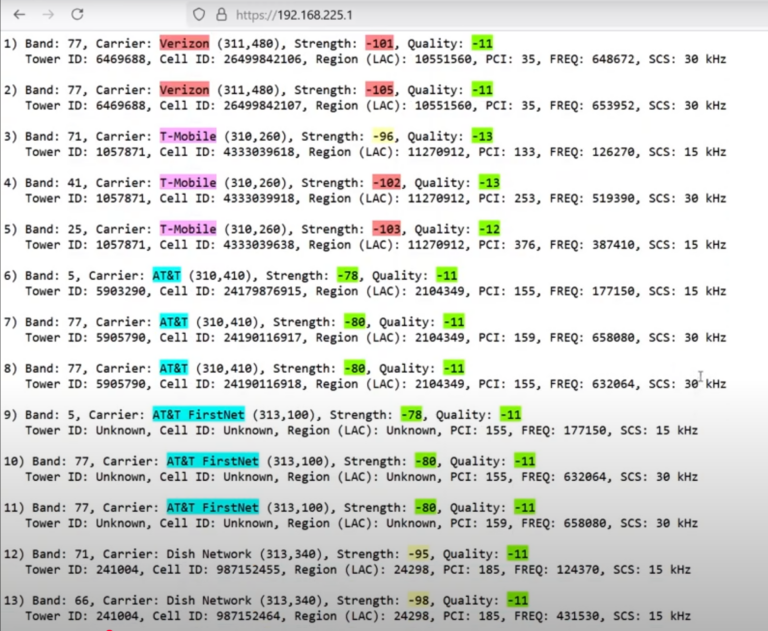
Start a local tower search and wait for results.
The scan will display a list of available bands, each identified by:
Band Number
Carrier Name
Frequency and PCI (Physical Cell Identifier)
If you see multiple options, compare them based on:
Signal Strength: Higher signal strength usually means a closer or stronger tower.
Speeds: Some towers may be farther away but offer faster speeds.
PCI Identifiers: Unique values indicating different towers or sectors.
If the scan doesn’t return expected results, run it multiple times. Network conditions and congestion can affect what appears in each scan.
Step 3: Locking to a Specific Tower
Automatic Tower Locking
If your preferred tower does appear in a scan:
- Find the band and tower you want in the scan results.
- Select the corresponding number and press Enter to lock onto it.
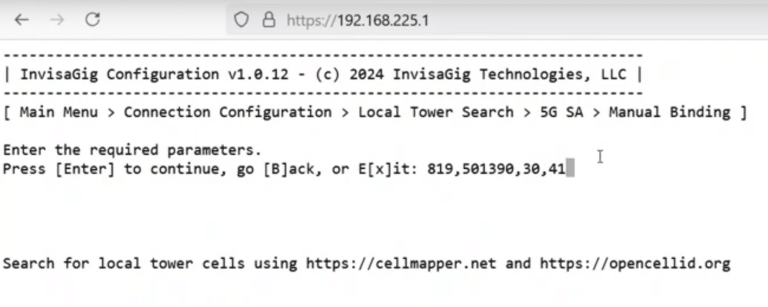
Manual Tower Locking: 5G Standalone
If your preferred 5G SA tower does not show up in a scan but appears on your Modem Info Page, you can manually enter the details:
- Press M for manual entry.
- Enter the required parameters in this order, separated by commas and with no spaces:
- PCI
- Frequency
- SCS (Subcarrier Spacing, for 5G SA only)
- Band
- Confirm the entry and allow the system to reconnect.
Manual Tower Locking: 4G LTE
If your preferred 4G LTE tower does not show up in a scan but appears on your Modem Info Page, you can manually enter the details:
- Enter the Connection Configuration area from the InvisaGig main menu and select Network Mode.
- Disable 5G Standalone by selecting LTE & 5G, but then choose Disable Standalone on the next menu.
- Go back to the Connection Configuration area from the InvisaGig main menu.
- Do a tower search, and specify LTE. Note the Frequency and PCI values from your preferred band.
- Press M for manual entry.
- Enter the required parameters in this order, separated by commas and with no spaces:
- Frequency
- PCI
- Confirm the entry and allow the system to reconnect.
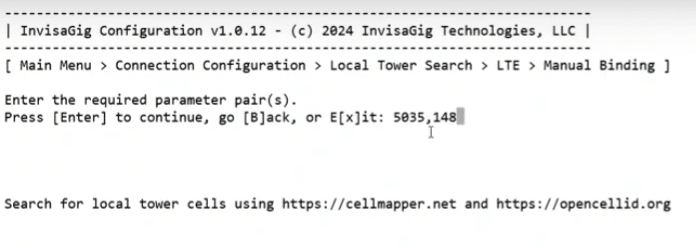
Tip: You can gather PCI and frequency details from CellMapper.net or similar tools if your modem has never connected to that tower.
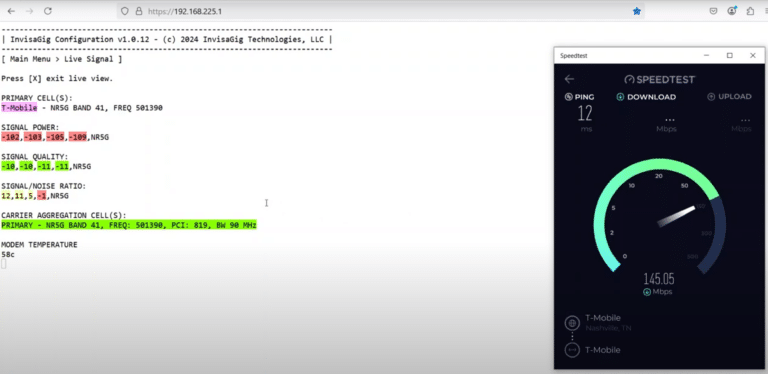
Step 4: Verifying the Connection
Navigate to Modem Info to confirm your connection.
Check if the Primary Cell matches the tower details you locked to.
If needed, run a speed test to compare performance.
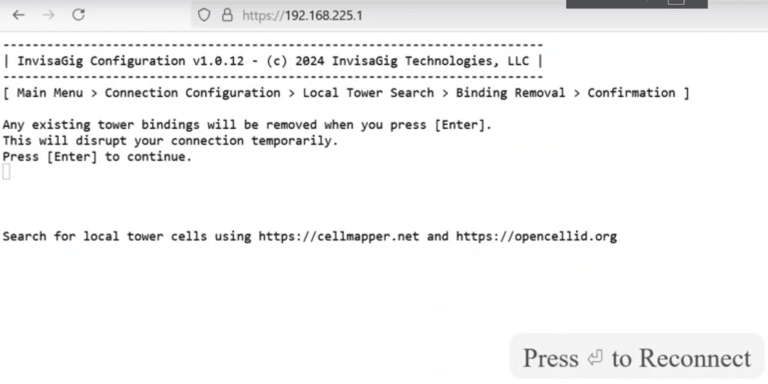
Step 5: Removing a Tower Lock
If you need to revert back to automatic tower selection:
Go to the Tower Locking Menu.
Select Remove All Tower Bindings.
Your connection will drop temporarily as the modem resets.
Once reconnected, check Modem Info to verify the unlocked status.
Comparing Different Towers: Why Locking Matters
During testing, different towers may provide vastly different speeds. For example:
Tower A (One 5G Band): 2x faster speeds despite weaker signal.
Tower B (Two Aggregated LTE Bands): Stronger signal, but slower speeds.
This highlights why tower locking can be essential for optimizing your connection.
5G Standalone vs. Non-Standalone: What’s the Difference?

Standalone 5G (SA): Uses only 5G and requires PCI, Frequency, SCS, and Band for locking.
Non-Standalone 5G (NSA) & LTE: Uses LTE as the primary connection and requires only PCI and Frequency for locking.
Switching Between SA and NSA
Navigate to Connection Configuration → Network Mode.
Select:
5G Standalone (SA) (Only available on T-Mobile currently).
LTE & 5G Non-Standalone (NSA) (For AT&T, Verizon, and general LTE users).
Note: Switching between SA and NSA can cause a brief disconnect as the modem rebuilds its connection.
Final Thoughts: Why Use Tower Locking?
The default automatic selection chosen by your cellular provider doesn’t always choose the best option. By using InvisaGig’s tower locking features, you can:
✅ Avoid slow connections by choosing the fastest tower.
✅ Prevent unwanted tower switching that causes instability.
✅ Fine-tune your network for optimal speed and performance.
With these tools, you can take full control of your internet connection and ensure fast, stable, and optimized speeds.

Let us know if you have any questions!
This has been Richard with InvisaGig—take care! 🚀
Contact the InvisaGig Sales Team to Discuss How InvisaGig Can Simplify Your Wireless Networking Needs
